
Whether preparing for a night out, an important meeting, or just wanting a sleek everyday look, straight hair can completely transform your appearance. If you’re new to heat styling, choosing and using a hair straightener might feel overwhelming. With so many types, features, and techniques out there, where do you begin?
This guide is explicitly crafted for beginners. It covers everything from types of hair straighteners and how they work to safety tips, buying advice, and step-by-step tutorials. Let’s straighten things out!
Chapter 1: What is a Hair Straightener and How Does It Work?
A hair straightener is a heat styling tool used to smooth out curls, waves, and frizz by temporarily altering the structure of the hair shaft. It does this through heated plates, typically ceramic, titanium, or tourmaline.
When heat is applied, the hydrogen bonds in your hair’s keratin (the main protein in hair) temporarily break, allowing your hair to be reshaped. Once cooled, the bonds reform, locking in the new style until your next wash or exposure to Humidity.
Chapter 2: Know Your Hair Type
Understanding your hair type is essential before purchasing a hair straightener. Different hair types require different tools and settings to avoid damage and achieve the best results.
1. Fine Hair
- Heat Tolerance: Low
- Best Plate Type: Ceramic
- Suggested Temperature: 250°F – 300°F
2. Thick or Coarse Hair
- Heat Tolerance: High
- Best Plate Type: Titanium or Tourmaline
- Suggested Temperature: 350°F – 450°F
3. Curly or Textured Hair
- Heat Tolerance: Moderate to High
- Best Plate Type: Titanium
- Suggested Temperature: 325°F – 400°F
Knowing your hair type will help you pick a product that’s effective and long-term.
Chapter 3: Types of Hair Straighteners
Understanding the different types available can help you make a wise choice. Here are the most common options:
1. Ceramic Straighteners
- Distributes heat evenly
- Ideal for fine to normal hair
- Reduces hot spots and heat damage
2. Titanium Straighteners
- Heats up quickly
- Ideal for thick or coarse hair
- Delivers high heat with consistent performance
3. Tourmaline Straighteners
- Emits negative ions for smoother hair
- Great for frizz control
- Suitable for most hair types
4. Steam Hair Straighteners
- Adds moisture while straightening
- Ideal for damaged or dry hair
- Minimizes the risk of burning
5. Wet-to-Dry Straighteners
- Designed to work on damp hair
- Not recommended for everyday use
- Useful for quick styling
Each type has pros and cons, so choose one that is appropriate for your hair type, goals, and frequency of use.
Chapter 4: Features to Look for as a Beginner
When starting, user-friendly features can make your styling journey easier and safer. Here are some key features to consider:
1. Adjustable Temperature Settings
Allows you to control the level of heat depending on your hair type.
2. Floating Plates
Plates that adjust to your hair’s thickness and angle for even pressure and less snagging.
3. Auto Shut-off
Essential for safety—automatically turns off the tool after a period of inactivity.
4. Fast Heat-Up Time
Saves time, especially when you’re in a rush.
Chapter 5: Preparing Your Hair for Straightening
Straightening begins before the tool touches your hair. Preparation is key to achieving a sleek, long-lasting style without damage.
Step 1: Wash and Condition
Use a sulfate-free shampoo and a moisturizing conditioner to prep your hair.
Step 2: Towel-Dry and Detangle
Gently towel-dry your hair and detangle using a wide-tooth comb.
Step 3: Apply Heat Protectant
This is non-negotiable. A heat protectant creates a barrier between your hair and the intense heat.
Step 4: Blow Dry (If Needed)
Make sure you ensure dehydrated unless you’re using a straightener.
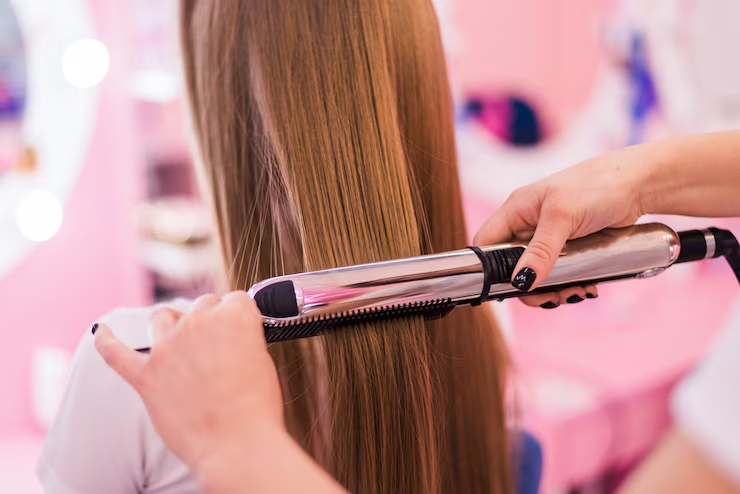
Chapter 6: Step-by-Step Guide to Using a Hair Straightener
Here’s how beginners can use a hair straightener effectively and safely:
Step 1: Section Your Hair
Divide your hair into manageable sections using clips. This ensures even straightening.
Step 2: Start from the Bottom
Begin with the bottom sections and work your way up.
Step 3: Adjust the Temperature
Use the correct heat setting for your hair type (refer to Chapter 2).
Step 4: Use a Smooth Glide
Place the straightener close to the roots and glide it down slowly. Don’t stop midway to avoid creases.
Step 5: Repeat Only if Necessary
Avoid going over the same section multiple times. One or two passes should be enough if you’re using the right temperature.
Chapter 7: Post-Straightening Care Tips
Straightening your hair isn’t the final step. Aftercare ensures the style lasts and your hair remains healthy.
1. Use a Lightweight Hair Serum
This adds shine and reduces flyaways.
2. Avoid Humidity
Humidity can reverse straightening. Use anti-humidity sprays if you’ll be outdoors.
3. Don’t Tie Your Hair Immediately
Let your hair cool completely before tying it to maintain the shape.
4. Avoid Heat Styling Too Often
Give your hair breaks between straightening sessions to maintain health.
Chapter 8: Common Mistakes Beginners Make
Knowing what not to do is as important as knowing the proper steps. Avoid these pitfalls:
❌ Using No Heat Protectant
Heat damage is often irreversible.
❌ Straightening Wet Hair with a Regular Tool
This can cause sizzling, breakage, and split ends.
❌ Using Too Much Heat
High heat doesn’t mean better results—it means higher risk of damage.
❌ Skipping Sections
Unorganized straightening leads to uneven results.
❌ Not Cleaning Your Straightener
Product buildup can damage your hair and affect performance.
Chapter 9: Cleaning and Maintaining Your Hair Straightener
Keeping your hair tool clean extends its lifespan and maintains performance.
How to Clean:
- Unplug and cool down the device.
- Wipe plates with a damp cloth soaked in alcohol or a plate cleaner.
- Dry with a microfiber towel before storing.
Storage Tips:
- Store in a heat-resistant pouch.
- Avoid wrapping the cord tightly around the device.
- Keep away from moisture.
Chapter 10: When to Replace Your Hair Straightener
Even the best tools need replacing over time. Here’s when to consider a new one:
- The plates are chipped or damaged
- It takes longer to heat up
- Hair pulls or snags during use
- The results are uneven despite proper use
Replacing your straightener on time ensures both safety and styling efficiency.
Chapter 11: Budget vs Premium Hair Straighteners
Budget Straighteners
- Pros: Affordable, easy to find
- Cons: Limited features, may not last long
Premium Straighteners
- Pros: Long-lasting, advanced features, better materials
- Cons: Higher cost
If you’re serious about your hair health, investing in a quality tool is often more cost-effective in the long run.
Conclusion
Using a hair straightener can initially seem intimidating, but with the proper knowledge, it becomes a simple and effective way to achieve polished, salon-quality hair at home. Start by understanding your hair type, choosing the right straightener with essential safety features, and never skipping heat protection.
For beginners looking for a reliable, professional-grade tool, Alan Truman offers a range of high-quality hair straighteners built with user-friendly features and durable materials. Their products combine style, performance, and safety—ideal for anyone starting their styling journey with confidence.