
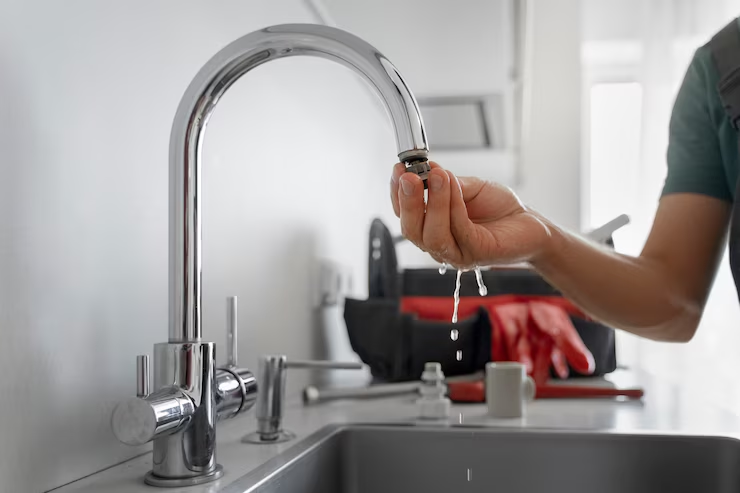
A dripping faucet isn’t just a background noise—it’s a slow drain on the water bill and a sign that something’s gone wrong. Most leaks are caused by a worn-out washer, a cheap little part that’s easy to swap. This guest post outlines how to fix a leaky faucet without needing a pro. It covers the tools, steps, and a few tricks to make the job painless. Anyone with a wrench and patience can handle this plumbing repair and stop that drip for good.
What’s Causing the Leak?
The usual suspect in a leaky faucet is a rubber washer that’s seen better days. It sits inside, sealing the water flow when the faucet’s off. Over time, it gets brittle, cracks, or wears thin, letting water sneak through. Compression faucets, common in older homes, rely on these washers, which are the focus here. Other faucet types, like cartridge or ball, work differently and might need more than a washer swap. Checking the faucet type before starting saves a trip to the store. Superior Plumbing and Heating https://superiorplumbing.ca handle everything from faucet fixes to air conditioning repairs, often point clients to this DIY for simple issues. It’s a quick win for homeowners looking to avoid a service call.
Getting Set Up for the Job
Jumping into faucet repair without prep is a recipe for a wet mess. Here’s what’s needed to stay organized:
- Cut the water supply: Find the shutoff valve under the sink. If there is no valve, the main water line is the next stop. Double-check it’s off to avoid surprises.
- Clear the pipes: Open the faucet to drain water from the line. Keep a rag handy for stray drips.
- Round up tools for replacing washers: Grab an adjustable wrench, a screwdriver (flathead or Phillips, depending on the faucet), and maybe needle-nose pliers for tight spots. A small bowl keeps screws from rolling away.
- Get the right washer: Hardware stores stock washers in all sizes. Bring the old one to match it exactly—guessing the size rarely works.
Having everything ready keeps the job smooth and the sink dry.
Steps to Replace the Washer
Here’s a no-nonsense guide to replacing washers in the bathroom or kitchen faucet:
- Pop off the handle: Look for a small cap on top of the handle. Pry it off with a flathead screwdriver to reveal the screw. Unscrew and lift the handle off. If it’s stuck, a drop of penetrating oil loosens things up.
- Remove the valve stem: A nut holds the stem in place. Turn it counterclockwise with an adjustable wrench, going slow to avoid scratching the faucet.
- Pull the old washer: At the bottom of the stem, the washer’s either screwed on or pressed in. Unscrew or pop it out and check its condition. Cracks or flattening mean it’s done.
- Fit the new washer: Slide it into place, ensuring it sits flush. If there’s a screw, tighten it just enough to hold firm—overdoing it strips the threads.
- To put it back together, Reattach the stem, tighten the nut, and screw the handle back on. Then, pop the cap on.
- Test for leaks: Turn the water back on and open the faucet. If there is no drip, the job’s done. If it still leaks, the valve seat might need a closer look.
Following these steps carefully usually solves the problem in under 30 minutes.
Tips for a Solid Fix
A few practical faucet repair tips can make the difference between a quick fix and a headache:
- Inspect the valve seat: The new washer won’t seal properly if it’s pitted or rough. A valve seat dresser tool can smooth it out, or it may need replacing.
- Buy quality washers: Cheap ones wear out fast. Spend more on durability and fewer repeat jobs.
- Don’t crank too hard: Overtightening nuts or screws can crack brass parts or ruin threads. Snug is enough.
- Check faucet age: If the faucet is old, a full replacement might be smarter than patching it up again.
- Stay organized: Keep screws and small bits in a bowl. Dropping one down the drain is a rookie move.
These pointers help ensure the repair lasts and the faucet stays drip-free.
Mistakes to Watch Out For
Beginners often trip up on simple things. Forgetting to shut off the water is a classic error that turns the job into a mop-up operation. Using the wrong washer size means the leak won’t stop. Rushing the disassembly can strip screws or damage the faucet’s finish. Not checking the valve seat can leave the new washer useless. Slowing down and double-checking each step avoids these pitfalls.
When to Get Help
If the drip doesn’t stop after a new washer, the problem might be a corroded or damaged valve seat, worn seals, or a different faucet type that needs special parts. At that point, calling a pro makes sense. Firms like Superior Plumbing and Heating can sort out tricky faucet issues or even unrelated systems like air conditioning, saving time and hassle.
Wrapping Up
Swapping out a faucet washer is a beginner-friendly way to stop leaks and reduce water waste. With a few tools, a new washer, and these steps for replacing washers, the job’s done quickly. Prep well, take it step by step, and don’t skip the small details. For tougher problems or other home fixes, pros like Superior Plumbing and Heating have the expertise to step in. Most leaks need this simple fix to get the faucet back in shape. This article is for informational purposes only and is not responsible for the consequences of an independent repair solution. We recommend that you contact a professional.